

VedronERP · Shipping & Carriers
Start Here: Your First Shipment
You create shipments from the Delivery tab of an order. This page walks you through the first one, start to finish. If a step does not work the way described, open Troubleshooting at the bottom — every message you can see on screen is explained there.
Before you start: connect a carrier (one time)
- Open Credentials and scroll to the Shipping group. All carriers you can use are listed there.
- Click your carrier and enter your own account details. The carrier application keys are managed for you, so you only enter what belongs to your carrier account.
- Save and test the connection. A carrier only appears in the "Create via API" list on orders once it is connected.
Create your first shipment
- Open Orders and click the order number of the order you want to ship.
- Open the Delivery tab. Check the green Delivery Address box — this is where the parcel will go.
- Next to "Create via API", choose your carrier. A form opens.
- Check the weight, add insurance or a reference if you need them, and click Create Shipment.
- The shipment appears under Shipments & Tracking with its tracking number. Pick a label size (A4 or a Zebra format) and download or print the label from the Actions column.
- Attach the label to the parcel and hand it to the carrier.
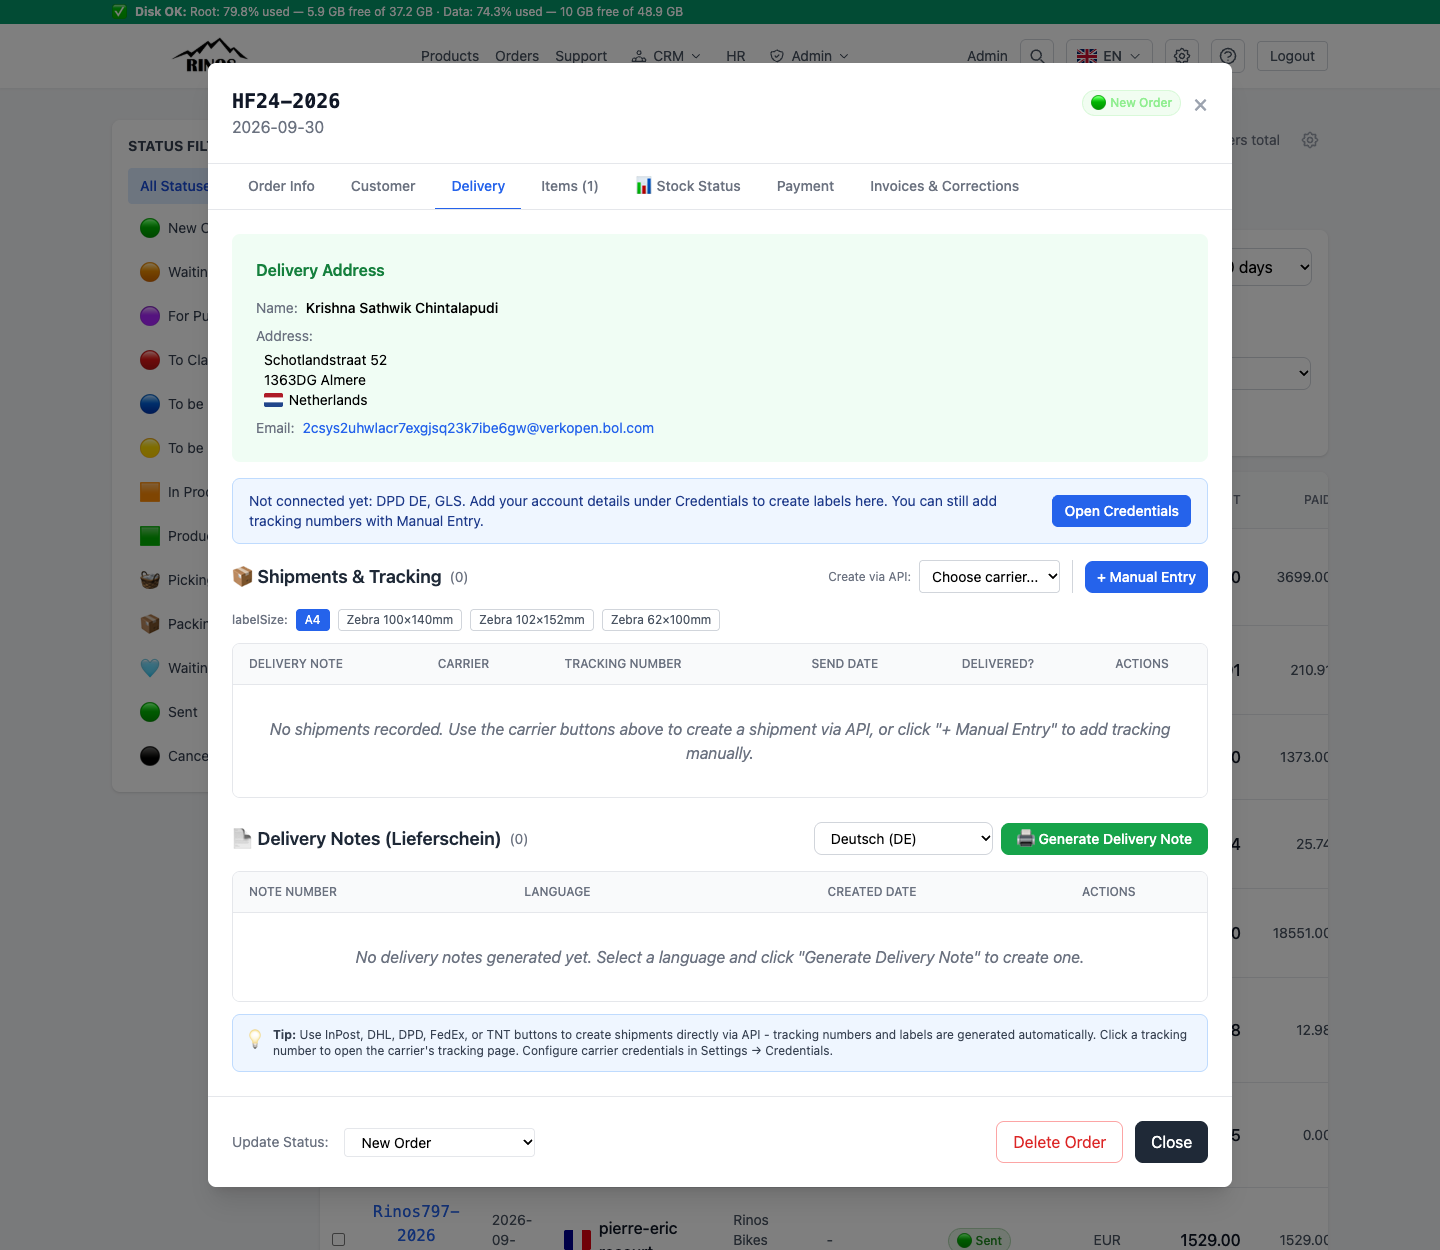
Tip: No carrier in the list? A blue box above Shipments & Tracking tells you which carriers are not connected yet and has an Open Credentials button. You can always add a tracking number by hand with + Manual Entry.
What to do next
- Shipping many orders at once → Bulk shipping.
- Customer is somewhere else this week → Alternative address.
- Customer sends something back → Returns.
- Printing on a thermal printer → Zebra label printing.
- Something went wrong → Troubleshooting.